Clerk
Use Clerk as a User Source so the people who already sign in through your Clerk instance can sign in to your MCP Gateways. Clerk’s OAuth applications feature turns your Clerk instance into an OIDC identity provider that Arcade can connect to. Once you have the values it tells you to copy, create the User Source in Arcade.
Before you start
- A Clerk account with admin access to the instance you want to use.
- A Clerk instance. Clerk maintains separate development and production instances per app, each with its own Frontend API URL. You can develop against the development instance first and switch the User Source to the production instance when you’re ready.
- An Arcade project where you’ll create the User Source.
Register an OAuth application in Clerk
Open the Clerk Dashboard
Sign in to the Clerk Dashboard . Pick the workspace that owns your Clerk application, open the application you want to configure, then in the application’s top tabs select Configure. In the left navigation under Developers, click OAuth Applications, then Add OAuth application.
Fill in the application details
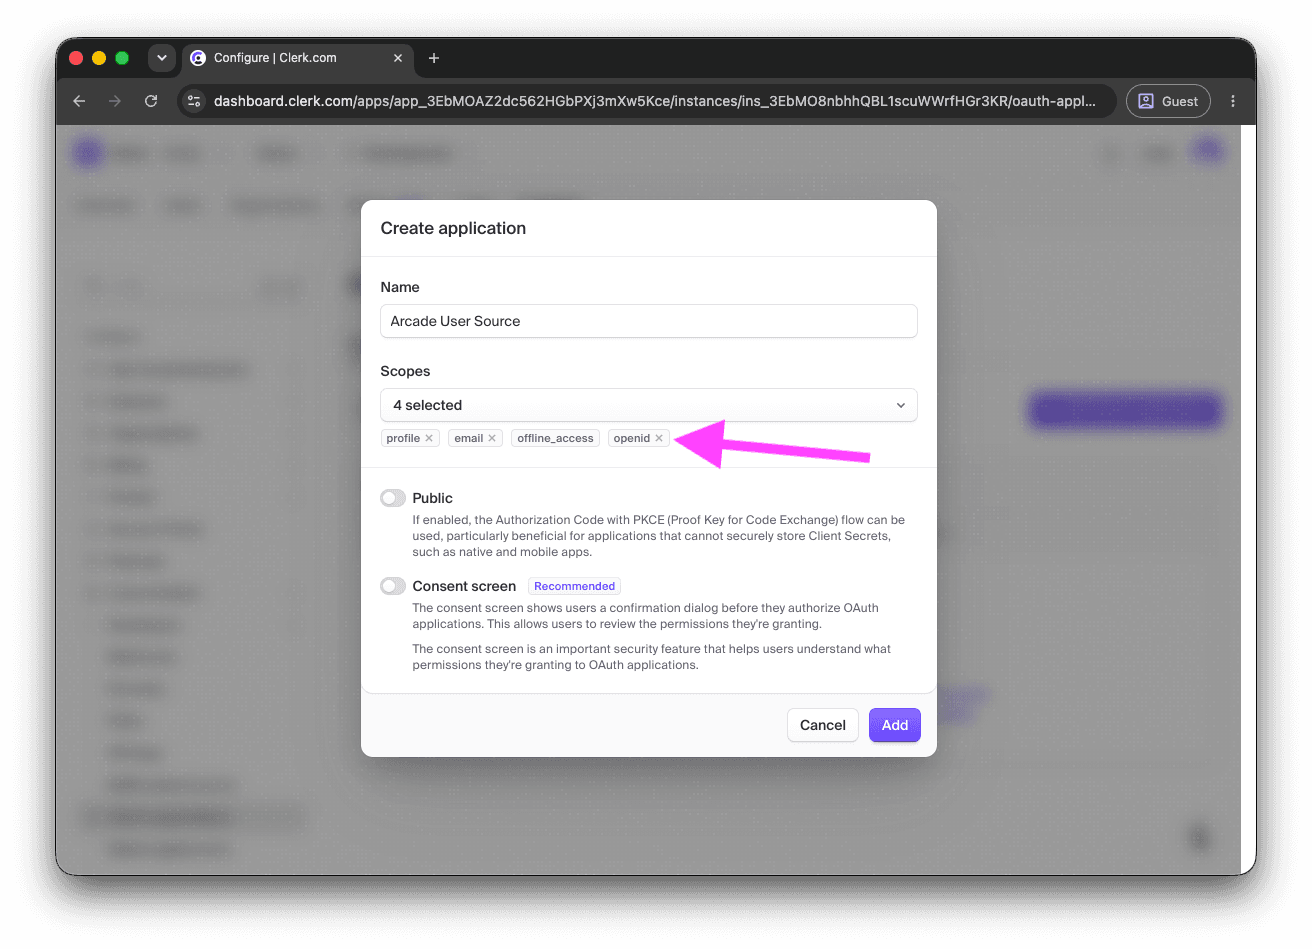
In the Create application dialog:
- Name: a label your team will recognize, for example
Arcade User Source. - Scopes: open the Scopes dropdown and make sure
openidis selected. Arcade also requestsprofileandemailby default, so add those if they aren’t selected already. - Public: leave this toggle off. Arcade authenticates with Clerk using a Client Secret, which the confidential flow supports. Arcade still uses PKCE on every sign-in regardless of this setting; the toggle only controls whether Clerk requires a Client Secret on token exchange.
- Consent screen: leave this toggle off. Clerk recommends enabling consent for third-party applications, but a User Source-backed gateway is part of your own identity infrastructure, so end users shouldn’t see an extra consent prompt at sign-in.
Click Add.
Save the Client Secret
Clerk shows the Client Secret in a one-time dialog after the application is created. Copy the value and store it somewhere secure. The full secret is not retrievable from the Dashboard afterward; if you lose it, regenerate a new one from the application’s settings.
Add the Arcade redirect URL
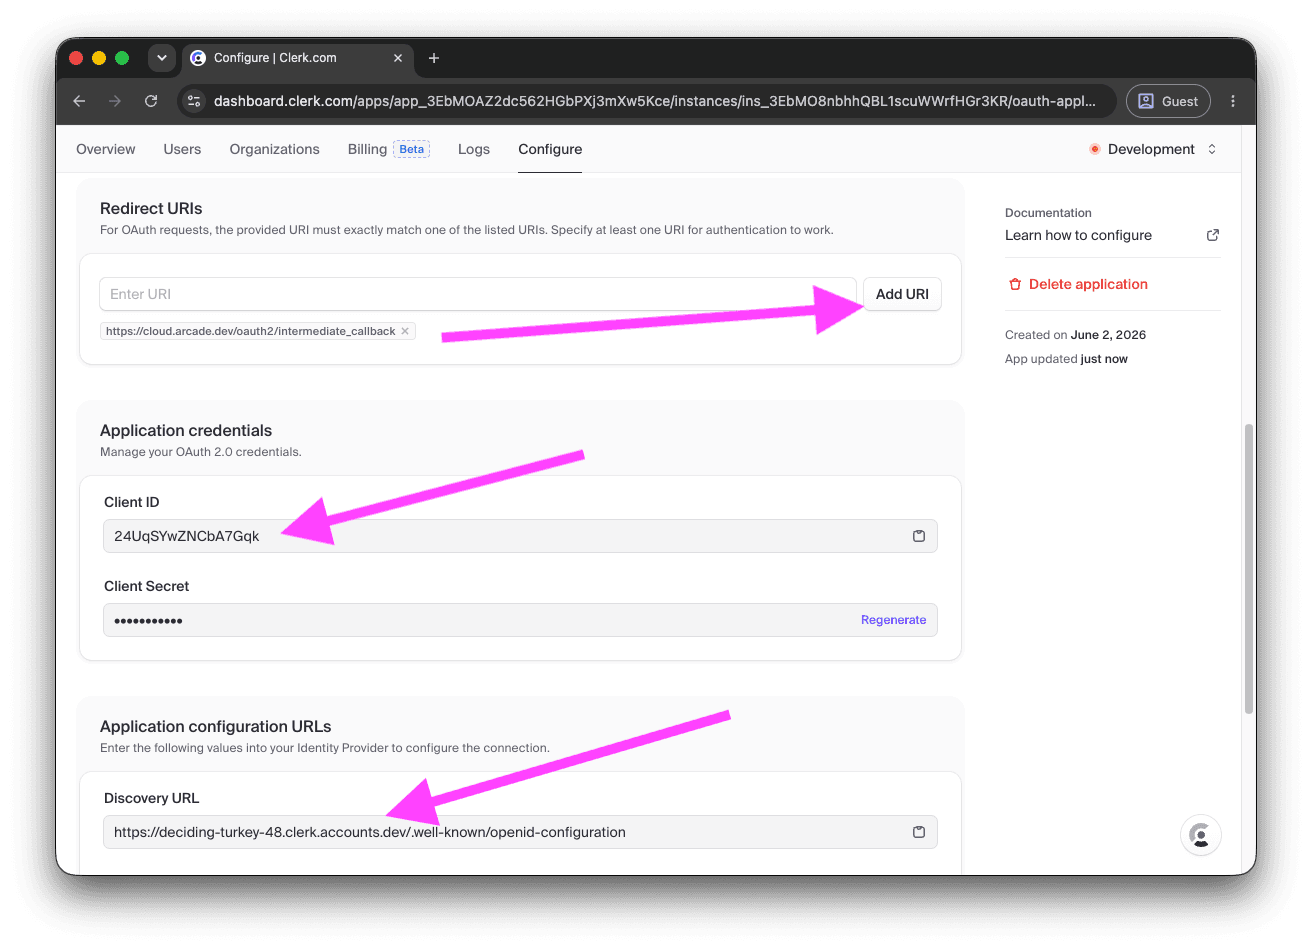
After closing the secret dialog, Clerk takes you to the application’s settings page. In the Redirect URIs section, click Add URI and enter:
https://cloud.arcade.dev/oauth2/intermediate_callback
The same page also surfaces your Client ID under Application credentials and your Discovery URL under Application configuration URLs — you’ll use both in the next section.
Copy these values to Arcade
Copy these values into Arcade’s User Source form:
| Arcade field | Where to find it in Clerk |
|---|---|
| Issuer URL | The OAuth application’s Discovery URL under Application configuration URLs, with the /.well-known/openid-configuration suffix removed. For example, https://<verb-noun-NN>.clerk.accounts.dev/.well-known/openid-configuration becomes https://<verb-noun-NN>.clerk.accounts.dev. Do not add a trailing slash. Clerk emits the issuer without one and Arcade matches the value exactly. |
| Client ID | The Client ID field under Application credentials. |
| Client Secret | The Client Secret you saved when you created the application. |
Create the User Source in Arcade
Open the Arcade Dashboard, select your project, navigate to User Sources, and click Create User Source. Paste the values from the table above. For a walkthrough of the form, see Create a User Source in the User Sources overview.
Once the User Source is active, attach it to an MCP Gateway by following Create via Dashboard and picking User Source under “Non-Arcade Users” in the gateway form.
Notes
- Development vs production instances: Clerk’s development and production instances have different Frontend API URLs and different OAuth applications. When you’re ready to move from a development setup to production, register a new OAuth application in the production instance and create a separate Arcade User Source for it.
- Client secret rotation: Clerk supports regenerating the Client Secret from the OAuth application’s Application credentials section. See Rotate the client secret in the User Sources guide for the Arcade-side procedure.
- Subject Claim: Arcade’s default Subject Claim,
sub, is the Clerk user ID and is the recommended value. Clerk’s OAuth applications also exposepublic_metadataandprivate_metadatascopes that surface the corresponding user metadata on the ID token, which lets you add organization, role, or other custom data to claims. See Advanced: scopes and subject claim in the overview for what makes a good claim.